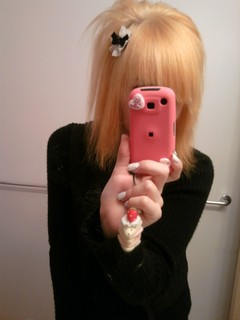
and please remember, i am not bossy, my ideas are just better.
today, we are going to do my first tutorial.
[or my second, but we will never revisit the first~]
today, we are going to do a two colored french tip.
it takes as little as 10 minutes [without the dry time]
[the diamond belt is a little hard to see, but IRL it is not i promise. it is well worth adding! if you want it to pop more use a different colored gem. i should have used lilac :CCC]
i have had acrylic nails on and off since 9th grade, i would be in 12th grade now but i dropped out.
[shut up i have my GED]
and i am simply disgusted by how much they charge for designs that are so easy to do yourself.
granted you will spend 20$+ on design supplies, but if a french tip runs you 5$, and then a rhinestone is another 1$ per stone, it WILL add up.
a fill where i go is 15$, i am usually charged 20-25$ because of the designs i add.
[i come up with all my own designs, usually, i draw them and would have the nail techs do it. i do not like flower designs, nor do i know how to do them]
start off with perfectly manicured acrylic nails with a SINGLE color of your choice.
i chose black.
the reason acrylic nails > real nails is the color will not chip. ever. unless you are magically able to do the most dumb thing ever. acrylic nails will fall off from time to time, but not if you take proper care of them. were as ALL real nails chip. mine used to chip within the first few /hours/ of doing them.
same for my poor Mommy who got a manicure for the first time in a long time. did a little cooking and cleaning, and bam. ruined.
you will need only 5 things to do this,
two different colors of nail design paint.
the color you want your french tip to be
[this only works if the color is infused with sparkles. such as the silver i am using]
the color your nail is all ready painted.
[to cover up any mistakes you may or may not make]
top coat
[obvious reasons]
a mechanical pencil
[used to place gems, you can use a tooth pic]
and gems
[i have a full color wheel now O w O 10$ at Sally's Beauty Supply]
[for spasific product names please look at video description.]
as you can tell i have all ready done my right hand, i did them with my left. my dominate hand is my right hand. i did not have to use the black design polish to fix it.
go me.
start by drawing an X on your nails.
i am so sorry, i had planned on having a photo tutorial as well as a video but my video skips in all the wrong places to get a decent screen shot.
:C
i learned this trick when i tried to replicate something my nail tech did for me before i started doing it myself. but i made the lines WAY to thick and saw that it was nearly a french tip.
so i just french tipped myself.
super easy and super adorable.
:3
after you have the X, fill in the blank spaces and carefully draw the line for where the french tip starts. do not worry about messing up, you can cover minor flaws with the same color as your nail nail design brush. and for large mistakes- you can start over.
it is just nail polish.
do this to all nails, obvi.
i always do my thumb last because my thumb knocks into things the most.
to apply the gems place a healthy helping of clear nail polish to the area you wish to apply them, i chose to apply them as a belt dividing the two colors on my ring fingers.
take the pencil [make sure it has no lead] and rub it on the clear nail polishes brush, so it has some on it as well.
open your circle to the color of gems you want [i chose clear square ones] and place them.
i reapply clear nail polish half way through because it will not hold as well to tacky nail polish as fresh.
[if you do not know what i mean please just watch the video. it is hard to explain. it took me years of watching my nail techs to do this. and my gems still fall off sometimes when i do it myself]
when finished apply a large amount of clear nail polish to your nails.
the thicker the better, but also the thicker the longer it takes to dry.
wait at least 10 minutes to do anything [except type~] and TADA
amazing nails for .001% of the price.
:3
ps, do not wear a long sleeved shirt when you do this.
it is really annoying.

No comments:
Post a Comment